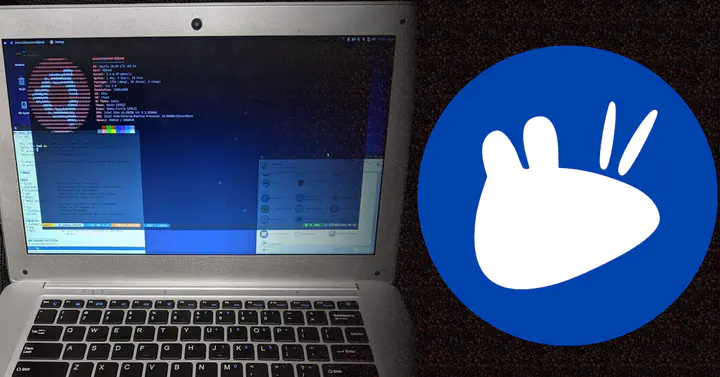
中古で12,800円の激安ノートPC(Jumper Ezbook 2)にXubuntu 20.04 LTS (Focal Fossa)を入れて幸せになる

経緯
先日近所のブックオフでこんなものを見つけた。

値札によると、 Jumper の Ezbook というものらしい。 多分 こちらで紹介されてる もの。
珍しく英語配列キーボードで、 Windows 10 もついて Windows 10 単体より安い。 ということで購入を決めた。
実際 FINAL FANTASY VII INTERNATIONAL for PC が快適に動かせる程度のスペックはあった。
とはいえ Windows は普段遣いするモノではない(≒ Emacs を快適に使えない)ので、 Xubuntu を入れることにした。
優秀なスペックとは言えないので快適というワケにはいかないが、 このブログ記事を Emacs で書きながら hugo を立ち上げ、 Gimp で画像編集をしつつ記事をプレビューする、 くらいのことは普通に出来ている。
ただキーボードの反応が悪いのはいかんともしがたい。 Ctrl(Caps Lock)とスペースをよく押し損じる。 真ん中のところを押すように意識すればいいので、慣れてくれば、まあ使えないこともない…。
珍しく 14 インチで、そこそこ軽いというのもあり、 雑に持ち歩けるエディタ環境という点では一定の価値があるかなー、という感じ。
以下、使えるようにするまでの道程を紹介する。
インストール用 SSD の外付け
せっかく Windows 10 が入ってるので、それは活かしておきたい。
ということで、昔使っていたノート PC に入っていた TOSHIBA の SSD を、 玄人志向 HDDケース で外付けドライブ化して使うことにした。
相当不恰好にはなるが、適当な面ファスナーで背面に貼り付けている。

USB 3.0 ポートを使っているからか、それほどパフォーマンスの問題は感じない。 元々、期待するようなスペックではないというのが大きいが…。
ちなみに最初は、 SSD なら何でも良かろうと思って コンパクトなエレコムの外付けSSD で試したが、 こちらは速度が遅くて使いものにならなかった。 Xubuntu のインストールに丸一日かかるレベル。
Xubuntu インストール
起動用の USB ドライブの作り方は 以前の記事 と同様。
作成した USB ドライブから起動出来るようにするには BIOS の設定を変える必要がある。
起動直後の以下の画面で ESC を押す。

すると BIOS 設定画面が開くので、 → キーで Boot タブを開く。

Boot Option Priorities というのが起動順を指定する設定。
#1 を選択して USB ドライブを指定する。
後は、普通にインストール。
パーティション指定は面倒だったので、外付けドライブ全てを / にした。
これでも特に問題は無さそう。
Ezbook 用の Tweak
Ezbook は実はトラックパッドに特殊なキー操作が割り当たっていて、意図せず暴発するのでこれを無効にする。
具体的には上端から下へスワイプすると Super+Down が押下されたことになる。
これがデフォルトでは Tile window to the bottom に割り当たっているので、
xfwm4-settings を立ち上げてショートカットを削除する。
ちなみに、右端から左へのスワイプは Super+A に、
下端から上へスワイプは Super+B に、
左端から右へスワイプは Super+TAB にそれぞれ割り当てられている。
これらのキーはデフォルトでは特にアサインされていなさそう。
次に、 xmodmap - ArchWiki を参考にキーマップを修正する。
Ezbook に限らず、 Caps Lock は Ctrl に割り当てたいので以下を ~/.Xmodmap に設定する:
clear lock
clear control
keycode 66 = Control_L
add control = Control_L Control_R
即反映するには xmodmap ~/.Xmodmap する。
また、 Ezbook では MacBook で / があるところに Delete があり、
MacBook で option があるところに \ があり使い辛くてしょうがないので、
Delete を / にする設定をする:
keycode 119 = backslash bar backslash bar
最後に、トラックパッドのスクロール方向が直感に反するので、 xfce4-mouse-settings を立ち上げ、
Reverse scroll direction にチェックを入れる。
Xubuntu の初期設定
まずはターミナルから Emacs キーバインドを有効にする:
xfconf-query --channel xsettings --property /Gtk/KeyThemeName --set Emacs
キーボードショートカットでいつでもターミナルを出せるようにしておく:
xfconf-query --channel xfce4-keyboard-shortcuts --property '/commands/custom/<Primary>minus' --create --type string --set 'xfce4-terminal --drop-down --hide-menubar --hide-toolbar --hide-scrollbar'
簡易 Spotlight 的な:
xfconf-query --channel xfce4-keyboard-shortcuts --property '/commands/custom/<Primary><Alt>space' --create --type string --set 'xfce4-appfinder -c'
キーリピート設定をする:
xfconf-query --channel keyboards --property '/Default/KeyRepeat/Delay' --create --type int --set 350
xfconf-query --channel keyboards --property '/Default/KeyRepeat/Rate' --create --type int --set 20
numlockx の設定をする:
echo NUMLOCK=off | sudo tee /etc/default/numlockx
Linuxbrew を入れる:
sudo add-apt-repository ppa:git-core/ppa -y
sudo apt update
sudo apt install curl git -y

/bin/bash -c "$(curl -fsSL https://raw.githubusercontent.com/Homebrew/install/master/install.sh)"
sudo apt-get install build-essential -y
echo 'eval $(/home/linuxbrew/.linuxbrew/bin/brew shellenv)' >> ${HOME}/.profile
eval $(/home/linuxbrew/.linuxbrew/bin/brew shellenv)
brew install gcc
zsh を入れる:
brew install zsh
Git の認証ヘルパー等の設定をする:
sudo apt-get install libsecret-1-0 libsecret-1-dev -y
(cd /usr/share/doc/git/contrib/credential/libsecret/ && sudo make)
git config --file ~/.gitconfig.local user.name yewton
git config --file ~/.gitconfig.local user.email yewton@gmail.com
git config --file ~/.gitconfig.local credential.helper /usr/share/doc/git/contrib/credential/libsecret/git-credential-libsecret
ターミナル環境の必需品(zplug, rcm , fzf , fasd , tmux , powerline , xclip, direnv) を入れる:
wget -qO - https://apt.thoughtbot.com/thoughtbot.gpg.key | sudo apt-key add -
echo "deb https://apt.thoughtbot.com/debian/ stable main" | sudo tee /etc/apt/sources.list.d/thoughtbot.list
sudo apt-get update

sudo apt install rcm fzf fasd tmux powerline xclip direnv -y
curl -sL --proto-redir -all,https https://raw.githubusercontent.com/zplug/installer/master/installer.zsh | zsh

echo 'source /usr/share/doc/fzf/examples/key-bindings.zsh' >> ${HOME}/.fzf.zsh
echo 'source /usr/share/doc/fzf/examples/completion.zsh' >> ${HOME}/.fzf.zsh
プログラミング用日本語等幅フォント Cica(シカ) をインストール:
wget https://github.com/miiton/Cica/releases/download/v5.0.1/Cica_v5.0.1_with_emoji.zip
unzip Cica_v5.0.1_with_emoji.zip
sudo mv *.ttf /usr/local/share/fonts/
sudo fc-cache -fv
.dotfiles を入れ、シェルを変更し、一度ログアウトする:
git clone https://github.com/yewton/.dotfiles.git
RCRC=~/.dotfiles/rcrc rcup
rcup -t ubuntu

echo $(which zsh) | sudo tee -a /etc/shells
chsh -s $(which zsh)
Orgzly のノートを Syncthing で同期しているので、 Syncthing をインストールする。
syncthing-gtk を入れると自動起動の設定が楽:
curl -s https://syncthing.net/release-key.txt | sudo apt-key add -
echo "deb https://apt.syncthing.net/ syncthing stable" | sudo tee /etc/apt/sources.list.d/syncthing.list
sudo apt update
sudo apt install syncthing syncthing-gtk -y
1Password CLI をインストール:
wget https://cache.agilebits.com/dist/1P/op/pkg/v1.1.0/op_linux_amd64_v1.1.0.zip
unzip op_linux_amd64_v1.1.0.zip
mv op ~/bin/
eval $(op signin my)
1Password CLI の JSON を扱うのに便利な Blacksmoke16/oq を入れる:
snap oq
Firefox アカウントを取得するにはこんな感じ:
op get item 'Firefox Account' | oq -r '.details.fields[]|select(.name=="username")|.value' | tr -d '\n' | pbcopy
op get item 'Firefox Account' | oq -r '.details.fields[]|select(.name=="password")|.value' | tr -d '\n' | pbcopy
op get totp 'Firefox Account' | pbcopy
GNU Emacs と関連パッケージをインストール:
sudo apt install build-essential texinfo aspell ripgrep cmigemo sqlite3 -y
sudo add-apt-repository ppa:kelleyk/emacs -y
sudo apt update
sudo apt install emacs26 -y
.emacs.d や個人設定をインストールする:
git clone https://github.com/yewton/.emacs.d.git
echo -e "(setq custom-file \"~/.emacs.local/init.el\")\n(load custom-file)" > ~/.emacs.d/custom.el
Emacs 外での日本語入力のため Mozc をインストールして設定:
sudo apt install -y fcitx-mozc
im-config -n fcitx

sudo reboot # 一度再起動する

fcitx-config-gtk3 # 設定 GUI が立ち上がる
asdf vm 本体とプラグインをインストール:
brew install asdf
asdf plugin add ruby
asdf plugin add python
asdf plugin add nodejs
asdf plugin add golang
asdf plugin add hugo https://github.com/beardix/asdf-hugo
bash -c '${ASDF_DATA_DIR:=$HOME/.asdf}/plugins/nodejs/bin/import-release-team-keyring'
asdf install
素敵なアイコンテーマ numix-icon-theme-circle をインストール:
sudo apt install numix-icon-theme-circle
アイコンテーマ以外も含めて、全部 Numix にするとよろしい:
xfce4-appearance-settings
xfwm4-settings
sudo lightdm-gtk-greeter-settings
dylanaraps/neofetch をインストール:
sudo apt install neofetch -y